Following a Cricket Chase One Over at a Time
Follow a cricket chase one over at a time by reading the target, legal balls and batting options together, so each change on the scoreboard has context.
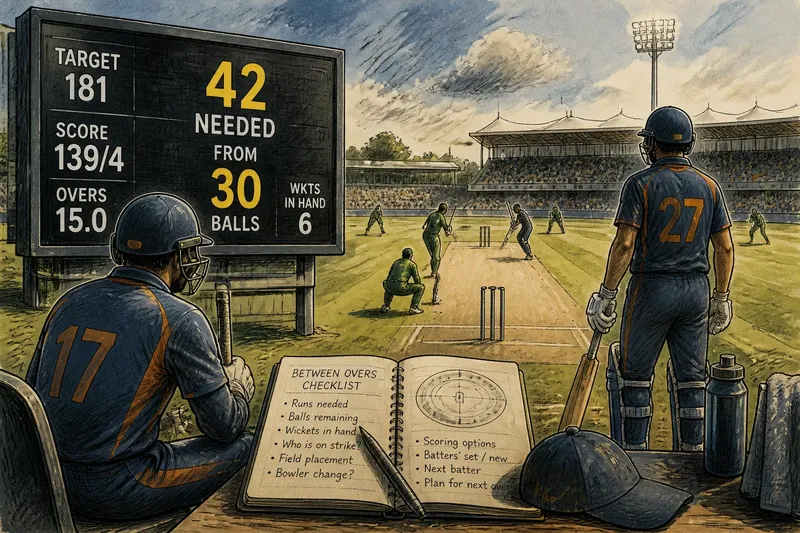
A broadcast flashes “42 needed from 30 balls”, and the batter at the non-striker’s end has yet to face a delivery. Following a cricket chase one over at a time means reading that moment in context: the target, the legal balls left, the wickets in hand and the people at the crease.
The required rate is useful, but it cannot tell you whether a side can take singles, whether a new batter is under pressure or whether a field change has closed an easy scoring route. Watch how each over alters the choices, rather than trying to predict every shot.
What does the scoreboard tell you about a cricket chase?
The target is the score the batting side must reach to win. If the target is 181, the side needs 181 runs from its starting score to win; reaching 180 means the scores are level. Whether a tie leads to a tie-breaker or another outcome depends on the competition’s playing conditions.
“Runs required” usually means the gap between the batting side’s current score and the target. Read the scoreboard label carefully, especially if rain has interrupted play or the target has been revised. In those situations, use the current displayed target and match conditions rather than an earlier mental calculation.
Consider the gap alongside the legal balls remaining. A demanding rate can still leave room for singles and selected boundaries; with fewer balls left, the batters may have to accept more risk. The rate describes the pace required, not how easily the batters can produce it.
How do wickets and the batting pair change the options?
Wickets in hand are the number of batters who can still be dismissed before the innings ends. They are not a store of runs. A side with several batters still to come may be able to take a calculated risk, while a side near its last pair may need to protect the batter best placed to stay in.
Look at who is batting, not only at the wicket count. A settled batter may judge the bowling and keep the strike moving; a new batter may first need to find their timing. The next batter waiting to come in matters too, though a player’s likely approach depends on their role and the situation.
A dismissal can change the chase in different ways. Losing a struggling batter might leave the established player in control, while losing the main scorer could force the incoming batter to take responsibility sooner. Notice who faces the next delivery and whether the pair can rotate the strike.
What can you learn from one over?
At the start of an over, note the score and who is on strike. At the end, check the runs added, whether a wicket fell and who will face the first ball of the next over. Strike matters because a batter who has found boundaries may not be able to attack straight away from the non-striker’s end.
Then look at how the runs came. A quiet over of firm defence and well-judged singles is different from one full of dot balls and mistimed shots, even if both add little to the total. The first may show that the pair is managing the bowling; the second may point to mounting pressure.
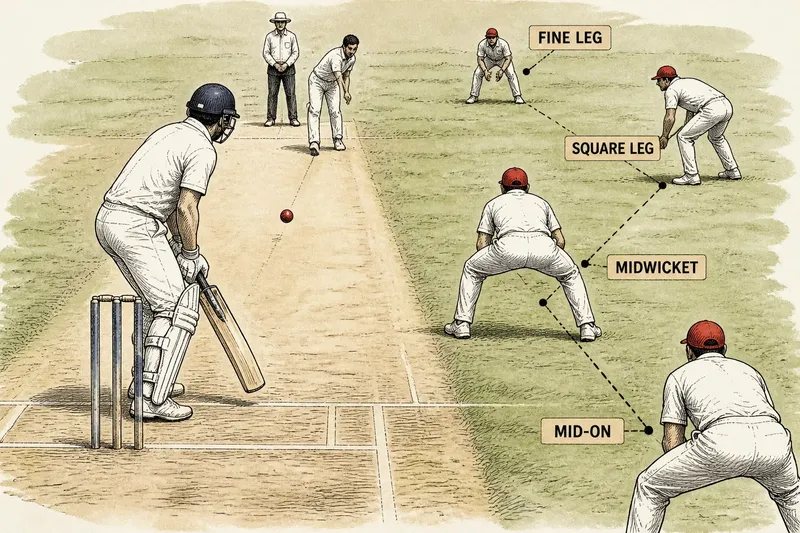
Field placement offers another clue. If fielders close in around the bat, quick singles may be harder to take; if a boundary rider is waiting, a safer shot along the ground may be available. You need not identify every position: watch which scoring route the field appears to allow and whether the batter uses it.
How does the task shift through the innings?
Early in a chase, a side may look to build a base without spending wickets quickly. That is not a fixed rule: the target, pitch, batting order and match situation all affect the opening approach. Pay attention to the choices actually made.
In the middle of the innings, batters often have to balance steady scoring with the risk of losing a wicket. Singles and twos can keep the board moving; a boundary can ease pressure. If the field blocks those easier routes, a batter may try a more demanding shot, with a dismissal potentially changing the plan.
Late in the chase, the balance depends on both the balls left and the batters available. A side with wickets in hand may bring in a player suited to boundary hitting; a side with few batters left may need to preserve the one best able to stay at the crease. A change of bowler, a wicket or a burst of boundaries can make the next over a different problem from the last.
Which chase questions are useful to ask?
How do I work out the required rate?
Divide the runs still needed by the overs remaining to estimate the runs required per over. If the display gives legal balls instead, use the overs-and-balls notation shown on the scoreboard or read its displayed rate, remembering that a partial over is not a whole over.
Why can the required rate rise after a scoring over?
The rate can rise if the runs added do not make up for the balls used, even though the target gap has fallen. A revised target or a change to the available overs can alter it too, so compare the current figures with the previous over.
Does a wicket always make a chase harder?
A wicket removes a batter and brings someone new to the crease, but its effect depends on who was dismissed and who remains. Losing a settled scorer may disrupt the plan more than losing a batter who was struggling, particularly if capable batters are still to come.
What matters when the scores are close?
Check the exact runs needed and legal balls left, then follow the strike and the next delivery. A single, wide or boundary changes the immediate situation; competition conditions determine how a tied score is resolved.
How does a worked chase reading play out?
Imagine an invented chase with a target of 181, a score of 139, 30 legal balls remaining and six wickets in hand. The side needs 42 runs to win, so the scores would be level at 180 and the target would still be one run away.
In this invented situation, the pair takes two singles and then a new batter is dismissed trying to clear the boundary. The score moves to 141, leaving 40 runs needed from 27 legal balls and five wickets in hand. One established batter remains, while the incoming batter has not yet faced a delivery.
The reading is mixed, not simply “comfortable” or “lost”: the target gap has narrowed, but three balls have been used and a wicket has fallen. In the next over, watch whether the established batter can keep taking singles and whether the new batter gets a chance to settle. Those observations reveal more about the immediate plan than the required rate alone.
What should you check between overs?
Use these prompts to spot what has changed. Each item links an observation to a decision, with an alternative if the first reading does not fit.
- Target gap: Check the runs required against the displayed target; if the figures do not reconcile, use the current scoreboard and confirm whether the target changed, rather than relying on an old calculation.
- Legal balls: Check how many deliveries remain; if there is ample time for singles, watch whether the batters rotate strike, but if the innings is nearly over, pay closer attention to boundary attempts.
- Wickets in hand: Check how many batters can still be dismissed; if several remain, a calculated attacking shot may be available, but if few remain, watch for the established batter to take more responsibility.
- Batting pair: Check who is settled and who is new; if the new batter faces next, watch for a cautious start, but if the settled batter keeps strike, assess whether they can continue scoring.
- Strike: Check who will face the first ball of the next over; if the stronger scorer has strike, watch for an attacking option, but if not, look for the partner to rotate strike safely.
- Scoring route: Check whether singles or boundary options appear open; if fielders leave gaps, watch for placement and quick running, but if the field closes those routes, expect the batter to consider a different shot.
- Recent change: Check for a wicket, bowling change or altered field; if it has shut down the previous scoring route, look for the pair to adjust, but if the same route remains available, see whether they can use it again.
Following a cricket chase one over at a time makes the required rate easier to interpret because it connects the number to the batters’ options. When the rate changes, check what happened to the balls, wickets and strike; that will show whether the chase has gained time, lost a resource or simply changed its immediate plan.